Difference between revisions of "HOWTO:New Drawing"
From WireCAD Online Help
| Line 25: | Line 25: | ||
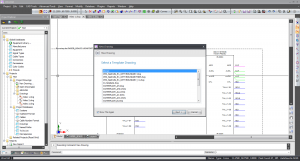
|A dialog box will pop up asking you to select a drawing template. This will be based on the type of paper you plan to print your drawings on. || [[File:Drawing Template.png|thumb|Drawing Template]] | |A dialog box will pop up asking you to select a drawing template. This will be based on the type of paper you plan to print your drawings on. || [[File:Drawing Template.png|thumb|Drawing Template]] | ||
|- | |- | ||
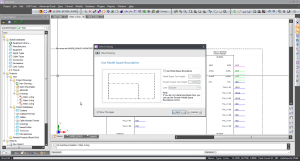
| − | |Select your | + | |Select your template and ''Click'' '''[Next]'''. || You will now have a dialog box pop up asking you to select if you want to use ''Model Space Boundries''. Selecting use ''Model Space Boundries'' will put a ''Boundry'' on your model space based on what your template choice. You can draw outside the boundry but if you print that page, anything outside that boundry will not be printed. [[File:Model Space.png|thumb|Model Space Boundries]] |
|- | |- | ||
|Enter your project name, description, path, and lead person ||The Project Name must follow file naming conventions because we are going to make a folder with the project name. | |Enter your project name, description, path, and lead person ||The Project Name must follow file naming conventions because we are going to make a folder with the project name. | ||
Revision as of 14:30, 11 October 2011
| Command Line Shortcut: np User Permissions Level: All |
Before You Start
There are a couple of things you need to think about before you create your new drawing: What type of paper/printer layout will you be using when it comes time to print your project. What will this drawing be named.
How To Create a New Drawing
| Step | Description |
|---|---|
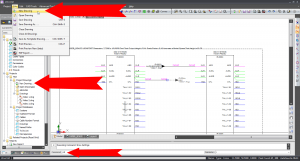
| Click File>New Drawing OR Click the New Drawing tab in the Project Explorer Or enter nd in the Command Line | |
| A dialog box will pop up asking you to select a drawing template. This will be based on the type of paper you plan to print your drawings on. | |
| Select your template and Click [Next]. | You will now have a dialog box pop up asking you to select if you want to use Model Space Boundries. Selecting use Model Space Boundries will put a Boundry on your model space based on what your template choice. You can draw outside the boundry but if you print that page, anything outside that boundry will not be printed. |
| Enter your project name, description, path, and lead person | The Project Name must follow file naming conventions because we are going to make a folder with the project name. |
| Click [Next >] button | |
| Inspect the information about where we are going to create the project. If all is well Click the [Finish] button. | Your new project will be created.
|
Project File Structure
We will create a project folder wherever you selected and two subfolders:
- YourProjectName
- -Drawings
- -Project Databases
If you opted for SQL Server databases your Project Databases folder will be empty. This is normal since the database files reside on the server.


