|
New Location |
  
|
|
New Location |
|
Database > Locations [New]
Commandline: none
Explanation
This tool is used to create entries in the project Locations lookup table.
Prerequisites
| 1. | None |
Operation
| 1. | Start the tool. |
| 2. | Enter the data in the fields as desired. |
| 3. | Verify the the Qualified Location looks acceptable (its the part that the rest of WireCAD uses). |
| 4. | Click [Add]. |
Related Topics
Dialog Options
Item |
Description |
|---|---|
Campus |
Enter the Campus name if applicable. If there are multiple numbered campuses you can increment the Count field to append a number and create multiple records for each. |
Building |
Enter the Building name if applicable. If there are multiple numbered buildings you can increment the Count field to append a number and create multiple records for each. |
Floor |
Enter the Floor name if applicable. If there are multiple numbered Floors you can increment the Count field to append a number and create multiple records for each. |
Room |
Enter the Room name if applicable. If there are multiple numbered Rooms you can increment the Count field to append a number and create multiple records for each. |
Rack |
Enter the Rack name if applicable. If there are multiple numbered Racks you can increment the Count field to append a number and create multiple records for each. |
Qualified Location |
This is the important part. The Qualified Location is a concatenation of all the used fields. The fields are merely and organizational construct for you. WireCAD will use the Qualified Location throughout the application. |
|
Example
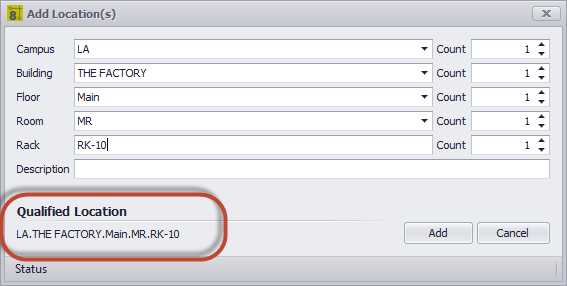
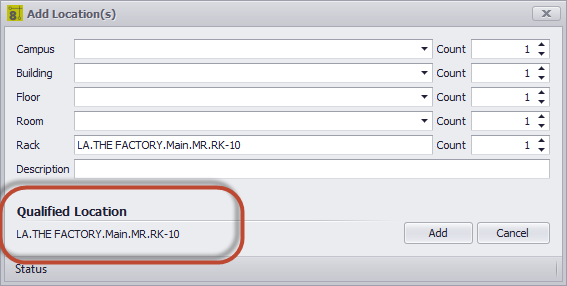
In the following example we will add two locations using different approaches to acheive the same result.
Step |
Result |
|---|---|
Enter the data across all fields. |
|
Enter the data in a single field |
|
As you can see from the above examples the Qualified Location is the same for both. It does not matter which approach you take.