|
<< Click to Display Table of Contents >> How To: Create a New Drawing |
  
|
|
<< Click to Display Table of Contents >> How To: Create a New Drawing |
|
1.Click Project>New Drawing

2.Select a template drawing from which to start.
Template drawings are drawings that have been saved in the template drawings folder and already have entities such as page borders, layouts and viewports added to them.
3.Click [Next >]
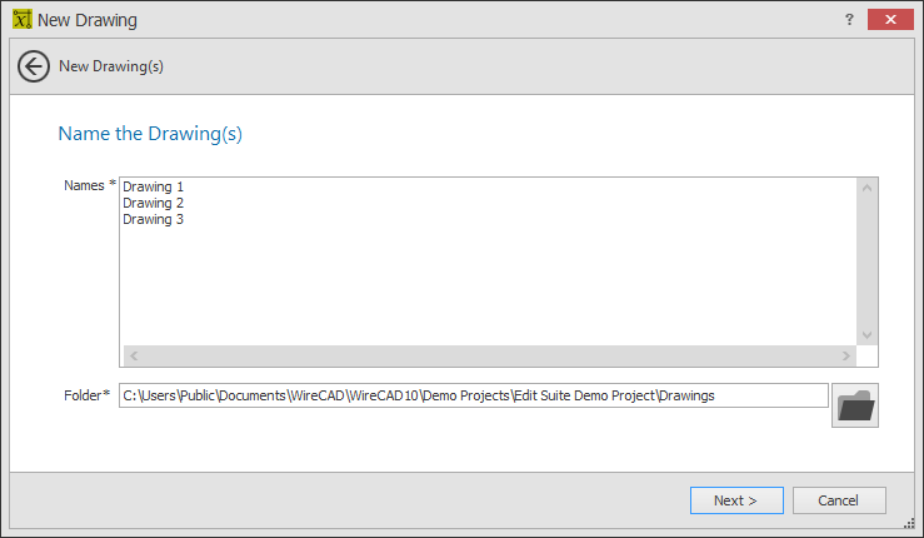
4.Name your drawing(s). We have added feature allowing you to create more than one drawing at a given time. Simply type the name of your drawing into the text box minus the file extension. If you are creating multiple drawings, enter one name per line. Click [Next>]
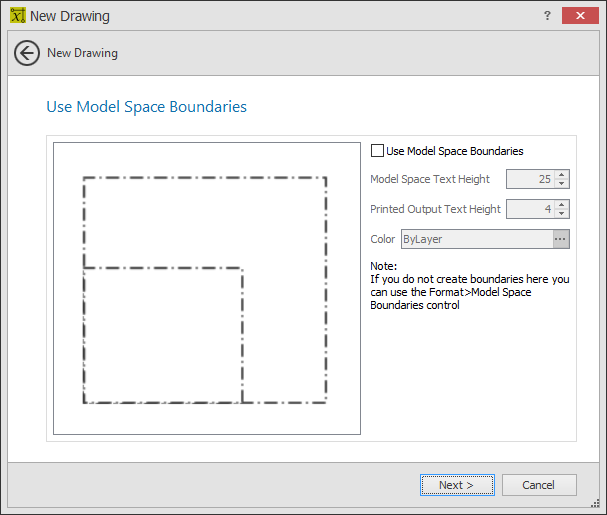
5.Select boundary settings. Create Model Space Boundaries. The Model Space Boundaries function takes two arguments, the Model Space Text Height and the desired Printed Output Text Height. Using these two variables in conjunction with the size of the Viewports in each Layout to create boundary rectangles in the Model space. Each boundary is accompanied by a text description that describes the Viewport and to which the boundary applies as well as the text heights and scale factor.
Note: You can add Model Space Boundaries later using the Drawing>Format>Model Space Boundaries ... function
6.Click [Next >] to finish and name your drawing.
WireCAD creates the drawing in the project drawings folder tree.